

Learning and asking for help — Academy, Help, Support requests and Ideas
This chapter covers the four places where you are not running your marketing: you're learning, clearing up a question, asking real people for help or asking for a new feature.
The rule for finding your way is simple:
| When you… | Go to |
|---|---|
| want to learn how the whole thing works | Academy |
| have a question and want to answer it yourself, right now | Help Center |
| are stuck and need someone | Talk to the Director → becomes a Support request |
| want something the system doesn't do yet | Ideas |
What's here
- 1. Academy — where you learn
- 2. A track from the inside
- 3. Your certificate
- 4. Help Center — answering questions on your own
- 5. The same center, on the website
- 6. Support requests — talking to real people
- 7. Ideas — asking for a new feature
- 8. Careful: there's ANOTHER help center — yours
1. Academy — where you learn
Where it is: full menu → footer → Academy (the graduation cap icon, next to
Ideas, Support and Help Center)
Address: /academy
What it's for
It's the platform's school. Three reading tracks — no video — that take the modules' manuals and put them in the order in which it makes sense to learn them. You read, check off what you've already understood, and at the end of the track you get a certificate.
The screen itself sums it up: "Three reading tracks, no videos and no fluff. Open to anyone; signed in, you check off what you finished and get the certificate at the end of the track."
Two important things:
- Reading is open. Anyone can read the full tracks, with no account and without paying anything. You can send the link to an employee who doesn't even have access to the system.
- Checking off progress and getting a certificate require being signed in. Your progress is saved in your account, not in the company — if you manage more than one company, the training stays yours.
Careful when you click: the Academy is on the website, not inside the dashboard. When you click Academy in the menu, the full menu and the company selector disappear from the screen. It's not an error — it's the website. To go back, use your browser's back button.
What you see
At the top: the Academy label and the title "Learn to use — and to sell — AI marketing".
Then the three tracks, one below the other. Each one is a card with the name, the summary sentence and the step count:
| Track | Its sentence | Steps |
|---|---|---|
| Operating the platform | "From a live website to the number you read every week — the house running from the inside." | 6 |
| Marketing for the right customer | "Attracting fewer wrong people costs less and sells more than attracting a crowd of anyone." | 7 |
| Build your agency | "From pricing that actually adds up to service delivery that does not depend on you being awake." | 5 |
The Build your agency track has one extra label, with a badge: with partner certificate.
If you're signed in, each card also shows your percentage (for example "6 steps · 33%") and a small progress bar. When the track is finished, in place of the percentage you see completed, with a green check mark.
Further down, a box explains: "The tracks reuse the platform module manuals, in the order that makes sense to learn. You can read everything without an account; progress and certificate are stored in your login."
And at the bottom of the page, the What you learn here section, with three blocks: Who it's for, How a track works and Why it matters.
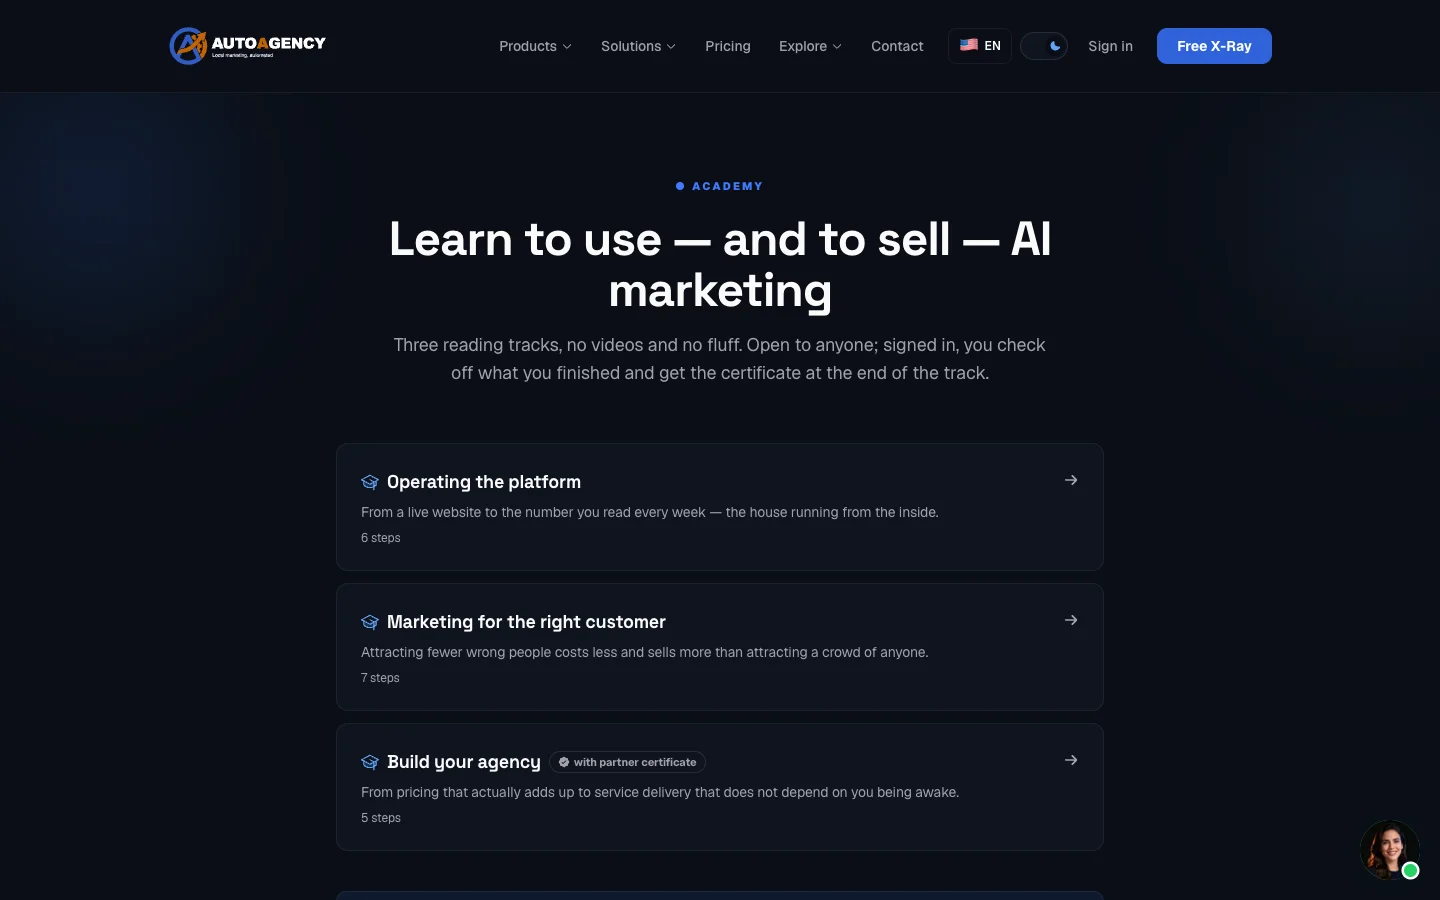 /academy screen with the three track cards and the "with partner certificate" label on the third
Which track is yours
Operating the platform — for those who just joined and want the house up and running. The six steps, in this order:
- Sites & Landing Pages
- AI WhatsApp Support
- SalesFlow
- Contact Tracking
- Push Notifications
- Analytics & Reports
Marketing for the right customer — for those who already have the house standing and now want to attract the right person instead of a lot of wrong ones. The seven steps:
- Ideal Customer Profile
- Brand
- Traffic Management
- Content & Copy
- Content & SEO with AI
- Local SEO + Google Profile
- Email marketing
Build your agency — for those who will resell the platform and serve their own clients. It's the only one that gives the partner credential. The five steps:
- Pricing
- AI Commercial Proposals
- SalesFlow
- Automation
- Affiliate Program
The order isn't decoration. The Marketing for the right customer track assumes you already know how to operate the platform, and Build your agency assumes the same thing. If you're just starting, do Operating the platform first.
Step by step — getting started
- In the full menu, in the footer, click Academy.
- Pick the track and click its card.
- Read the steps from top to bottom.
- If you want the system to save your progress, sign in to your account first — otherwise the screen only shows "Sign in to track your progress."
Common questions
"Loading tracks…" and it never goes away. Wait a few seconds. If "We couldn't load the tracks right now." appears, click Try again.
Do I need to have subscribed to the track's modules to read? No. The track text is open. What is closed is each module's full manual, inside the dashboard — see item 2.
2. A track from the inside
Where it is: /academy → click the track's card
Address: /academy/<nome-da-trilha>
What it's for
It's the lesson itself. Each step explains what that module delivers and how to read the result it produces, in business-owner language. The button-by-button walkthrough stays inside the module, in the dashboard — the track is the "why", not the "where to click".
What you see
At the top, the track's name and its sentence. Right below, an opening paragraph that explains why the track exists and in what order to read it.
If you're signed in, the progress bar appears: "2/6 steps" on the left and the percentage on the right.
Then, the numbered steps. Each step is a card with:
- the number and the module name;
- a paragraph saying why this step is in this track;
- a paragraph saying what the module delivers;
- a gray box with the title How to read the result;
- the Mark as completed button and the Full module manual link.
At the very end, a closing paragraph and — when the track gives a credential — the box that says: "Completing every step of this track while signed in gets you the Academy partner credential."
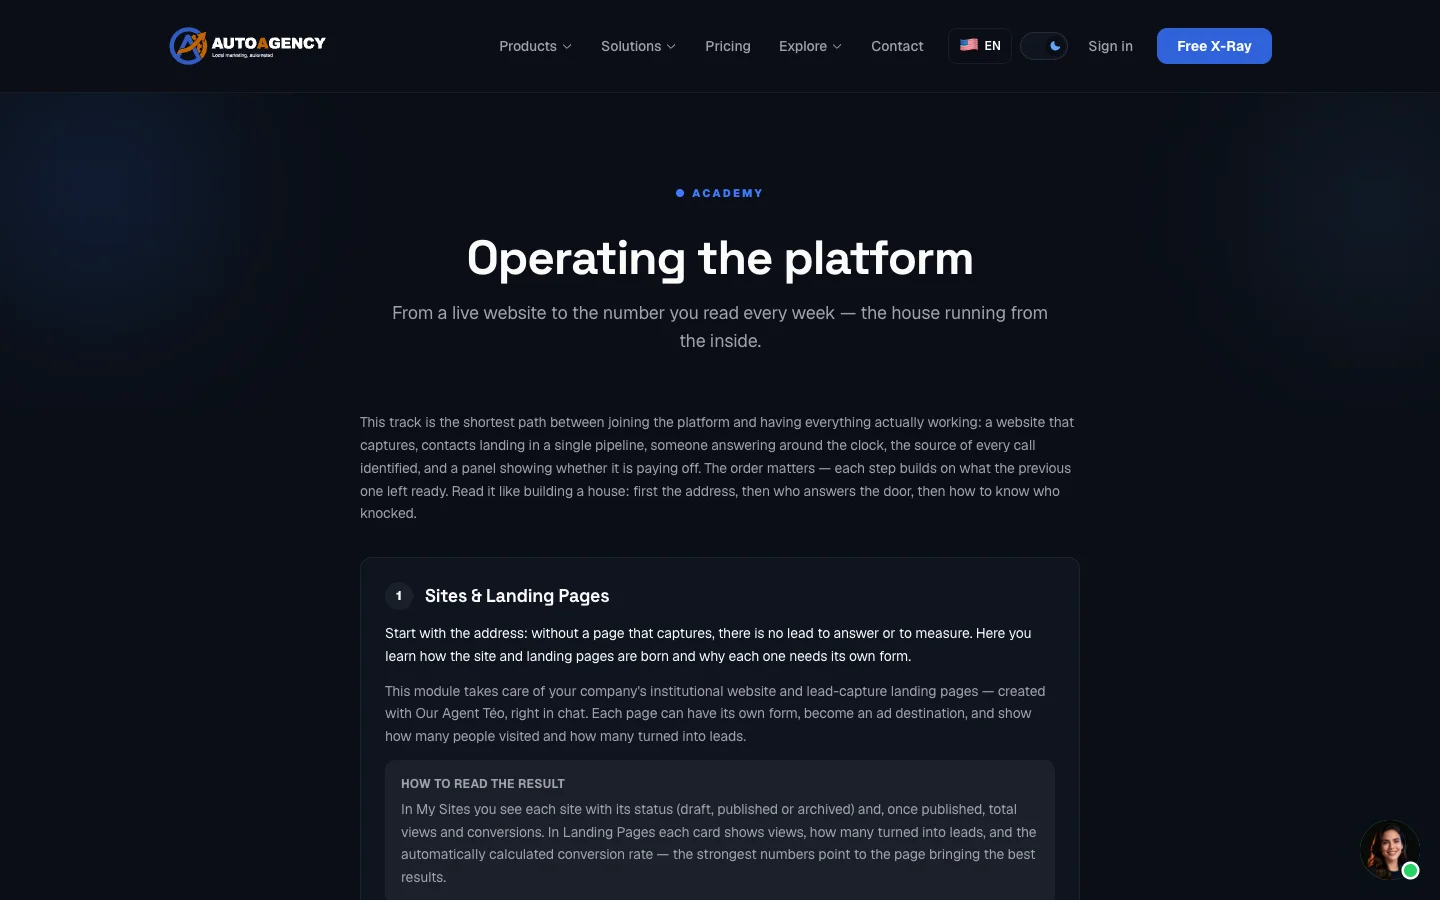 Screen of the "Operating the platform" track, with the opening paragraph, step 1 and the "How to read the result" box
Step by step — doing the track
- Sign in to your account. (Without that, the mark button doesn't even appear: in its place the screen writes "Sign in to track your progress.")
- Read step 1 in full, including the How to read the result box.
- Click Mark as completed. The button turns into Completed, in green, and the progress bar goes up.
- Repeat until the last step.
- When the last step is marked, the box at the end changes to Track completed!, with the sentence "Your certificate is issued and anyone can verify it through the link." and the View my certificate button.
You can't "skip to the end". The certificate only comes out when all the track's steps are checked. Checking the same step twice does nothing and doesn't duplicate anything.
Step by step — going to a module's full manual
- On the step's card, click Full module manual.
- You land on that module's How to use tab, inside the dashboard.
- If you haven't subscribed to that module, instead of the manual the module's offer screen appears. It's not an error: the detailed manual is content for those who have the module.
Common questions
"Track not found." appeared. The address is wrong or the link came broken. Click See all tracks.
I marked a step without reading it. Can I unmark it? No, and it's final. The Completed button locks after it's marked, and there's no way back — not on another screen, not through support: I checked on September 22, 2026 and the system only knows how to mark a step as done; there's nothing that erases that record.
Two practical consequences, so you mark with awareness:
- The track's percentage never goes down. If you marked six out of ten and three were without reading, the track will keep saying 60%.
- The certificate comes out when all steps are marked — even if you marked them without reading. The certificate attests that you went through the track, and the one who marks is you.
When in doubt, read first and mark afterward. There's no rush: the track doesn't expire.
I did the track without being signed in. Did I lose everything? There was nothing to lose: without signing in the system saves no progress at all. Sign in and mark the steps again — you've already done the reading.
3. Your certificate
Where it is: on the completed track, View my certificate button. Also by direct link.
Address: /academy/certificado/<código>
What it's for
It's the diploma. Each certificate has its own code, and its address is public: anyone who receives the link — a client, a partner — can open it and check that it's real, without needing any account.
All three tracks issue a certificate. The difference is that the Build your agency track also issues the Partner credential, which shows up as a badge on the diploma itself.
What you see
A diploma drawn as white paper with a blue frame (it's white even in the dark theme — it's a document). On it:
- the AutoAgency logo;
- the line Certificate of completion;
- We certify that + your name;
- completed the track + the track's name;
- the Partner credential badge, when it applies;
- at the bottom: Issued on + the date, Code + the code, and "Verify at" + the public address.
Below the diploma, three buttons: Download PDF, Print and Add to LinkedIn. Further down, the Share: line with shortcuts for LinkedIn, WhatsApp, X and a button to copy the link.
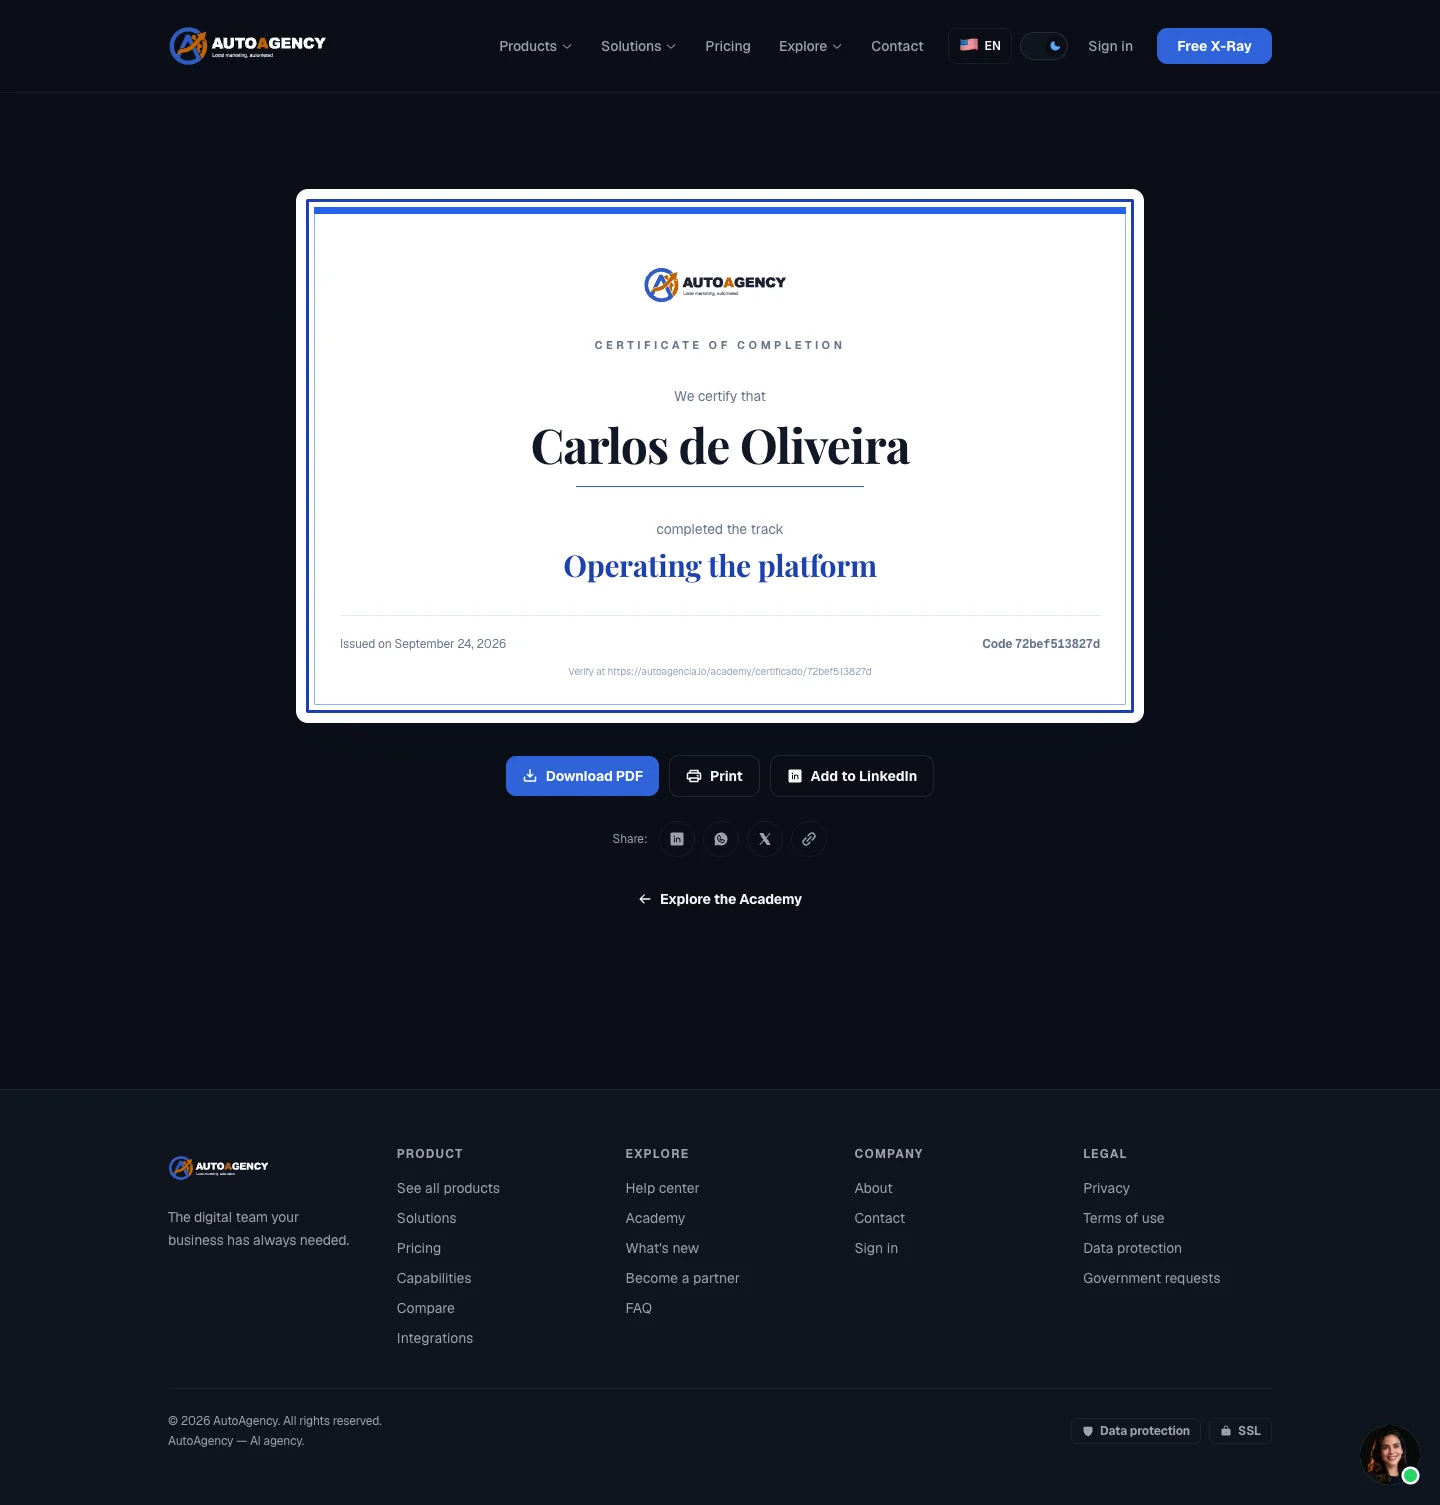 Certificate page, with the diploma and the row of buttons "Download PDF" / "Print" / "Add to LinkedIn"
What appears on the diploma is your name, never your email. And the page isn't indexed by Google: it exists for whoever has the link, not to show up in a search.
Step by step — downloading the PDF
- Open the certificate.
- Click Download PDF. The button shows "Generating…".
- The file downloads by itself, on a landscape sheet (A4 landscape), with the same verification URL printed.
Step by step — putting it on LinkedIn
- Click Add to LinkedIn.
- LinkedIn opens, in a new tab, already on the "licenses and certifications" form, with the name of the certification, the institution, the month/year and the code filled in.
- Confirm in there.
Step by step — proving to someone else that the certificate is yours
- Click the copy link button (the chain icon, next to the share shortcuts).
- Send the link. Whoever opens it sees the diploma with your name, the track, the date and the code.
Common questions
"Certificate not found". The full screen: "Check whether the code was copied in full." It's almost always a link cut off by WhatsApp or by email.
"We couldn't verify right now. Try again in a moment." This is different from the one above: here the system couldn't read it, and it isn't saying the certificate is invalid. Try again.
"We couldn't generate the PDF right now. Try again in a moment." The diploma on the screen is still valid — use Print in the meantime.
I lost the link to my certificate. Go back to the completed track: the View my certificate button is still there.
4. Help Center — answering questions on your own
Where it is: full menu → footer → Help Center, right below Academy.
Address: /app/ajuda
You can also get there by two other paths: the Check out the Help Center step in the dashboard's list of first steps, and the "this page doesn't exist" screen inside the dashboard, which offers the Help Center button.
The menu item was born on September 22, 2026. Until then the screen existed and had no door at all in the menu — only the two paths above and typing the address. Now it sits with the other account utilities: Ideas, Support, Academy and Help Center.
What it's for
It's the place to clear up a question without bothering anyone: a search, a list of frequently asked questions with answers, and — when you're signed in — the manuals of the modules you subscribed to.
The system itself recommends stopping by here at the start: the step in the list of first steps says "Five minutes here prevent most questions later — and you discover things the platform does that you didn't even know about."
What you see
The title How can we help? and, right below it, the search field with the sample text "Search a question — e.g.: credits, pricing, WhatsApp…".
Then, the list of questions. Each one is a line you click to open and read the answer. The questions are usually these:
- What is AutoAgency?
- Do I need to understand marketing to use it?
- How much does it cost?
- What are credits?
- Does it work for my type of business?
- Does the AI replace a real agency?
- Is my data safe?
- Is there a free trial?
- Can I cancel anytime?
- How do I reach support?
- How do I get started?
- What if I don't have a website?
- Is ad spend included in the price?
- How do you prove a customer came from an ad?
- How long until I see results?
- Does it work outside Brazil?
- I'm an agency. Can I use it with my clients?
- What happens to my material if I cancel?
That list is maintained by the team and may change without notice — questions come and go. If the one you're looking for isn't there, use the search.
Below the questions, three blocks:
- Your modules' manuals — shortcuts to the How to use tab of each module you subscribed to. This block only appears if you're signed in and have subscribed modules; and it respects what you typed in the search above.
- Ask Our Agent Arcturus — "Our Agent Arcturus is the AI companion that stays with you inside the panel and answers in plain language, any time." (On the website, the same block is called Ask Our Agent Rebeca: "Our Agent Rebeca is our AI assistant and answers in plain language, any time.")
- A box reminding you where the manuals are: "Step-by-step manuals live inside each module, in the 'How to use' tab — written and maintained by the agents themselves."
At the bottom of the page: "Still stuck? We reply fast, with real people." and the Talk to us button, which leads to the contact page.
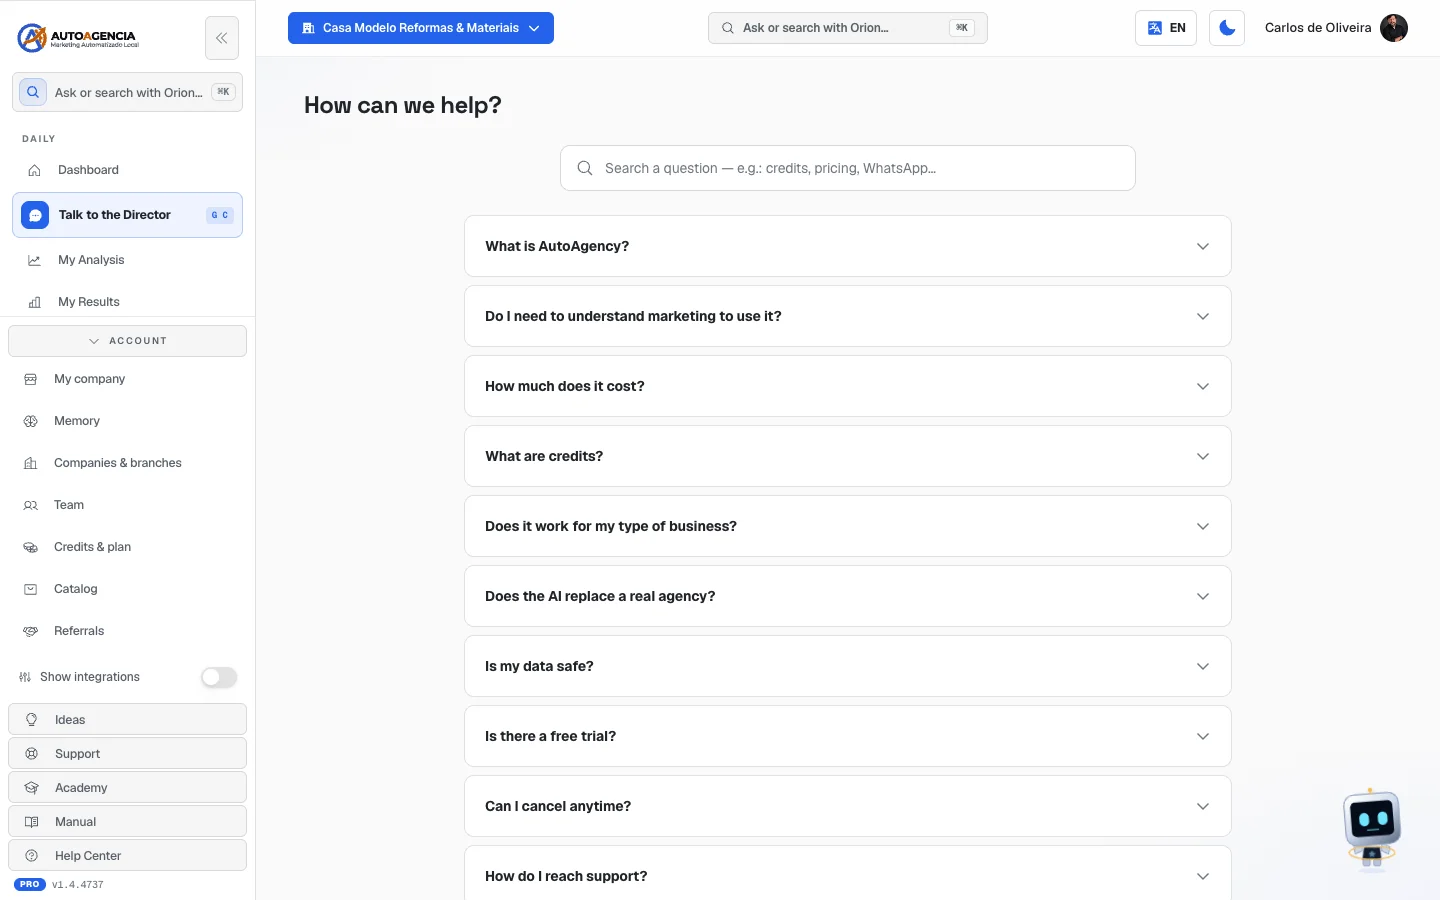 /app/ajuda screen with the title "How can we help?", the search at the top and the list of frequently asked questions, each one closed
Step by step — finding the answer to a question
- Open the Help Center.
- Type a word in the search field — one word is enough ("credit", "cancel", "ad"). You don't need to get the accents right: the search ignores accents.
- The list of questions shrinks to the ones that match, and the Your modules' manuals block starts showing only the modules that talk about that.
- Click the question to open the answer. Click again to close.
Common questions
"Nothing found for that term." Try a shorter, more common word. The search looks for the exact text in both the question and the answer.
Where is my module's detailed manual? Home → Your apps → the app → How to use tab. Or use the Your modules' manuals block here in the Center.
The Center says to click the "chat bubble in the corner of the screen". Who answers in that bubble? It depends on where you are — and they're two different people:
| Where you are | Who is in the bubble |
|---|---|
Inside the dashboard (/app/ajuda, and any other dashboard screen) | Our Agent Arcturus, the AI companion that stays with you all the time |
On the website, outside the dashboard (/ajuda and /help) | Our Agent Rebeca, the AI assistant |
Both are AI — they're not people — and they answer in plain language, any time. The bubble is always in the same corner.
Until September 22, 2026 this page invited you to talk to Ava in both versions — even inside the dashboard, where her bubble doesn't exist. Whoever was signed in looked for a bubble that wasn't there. Today each version presents whoever actually answers there.
5. The same center, on the website
Where it is: outside the dashboard, on the AutoAgency website.
Address: /ajuda (in Portuguese) and /help (the English version)
What it's for
It's exactly the same Help Center as in item 4 — same questions, same search —, only on the public website, without needing to be signed in.
Use this version when you want to send the link to someone who doesn't have an account: a partner, an employee, someone who is considering subscribing.
What changes compared with the dashboard version
/app/ajuda (dashboard) | /ajuda (website) | |
|---|---|---|
| Needs sign-in | Yes | No |
| Full menu and company selector | Stay on the screen | Disappear (it's the website) |
| Your modules' manuals block | Appears | Only appears if you're signed in |
| Rebeca's bubble in the corner | — see the question in item 4 | Appears |
6. Support requests — talking to real people
Where it is: full menu → footer → Support
Address: /app/tickets
What it's for
It's where you follow and answer the requests that were opened with AutoAgency support — that is, with us, when something broke on our side: a broken screen, an error when publishing, a preview that won't open, a wrong charge, an integration that's down.
The screen's sentence: "Everything you asked support, with our team's answer. You can reply right here."
How a request gets opened — read this first
This screen has no "open request" button. And that's on purpose.
The request is born in the conversation. You tell the problem to any specialist in Talk to the Director (full menu → Daily → Talk to the Director), in plain English, and they open the request for you — already filled in with what the system knows (which module, what you tried, the error message).
The Support requests screen itself explains this when it's empty: "A request is what we open when something breaks on our side. Just tell any specialist in the chat — they open it for you."
Step by step — opening a request
- In the full menu, click Talk to the Director.
- Write the problem the way you'd tell it over the phone. You don't need technical language. Example: "I tried to approve a post and got an error", "the results screen hasn't opened since yesterday", "my charge came out wrong".
- The specialist confirms with you the summary of the problem and the urgency before opening. Answer.
- They open the request. In the conversation the notice 🎫 Opening a ticket appears.
- From then on, follow it in Support, at the bottom of the full menu.
If someone in the chat tells you to "look for a Support screen", be suspicious: that screen doesn't exist. Either the specialist really opens the request, or they tell you they can't.
What you see
When there hasn't been any request yet, the screen shows No requests yet, with the explanation above and what will appear there when there is one.
When there are requests, the screen splits in two:
On the left, the list. One card per request, with the status in colored capital letters, the short
number (for example #a1b2c3d4), the subject, the date and the priority.
On the right, the open request, with:
- the subject;
- the identification line: number · date · priority · module (when there is one);
- the current status;
- the What you asked box — the copy of what was recorded when it was opened;
- the conversation, with each message marked as You or AutoAgency support, with date and time;
- the Write your reply… field and the Reply button.
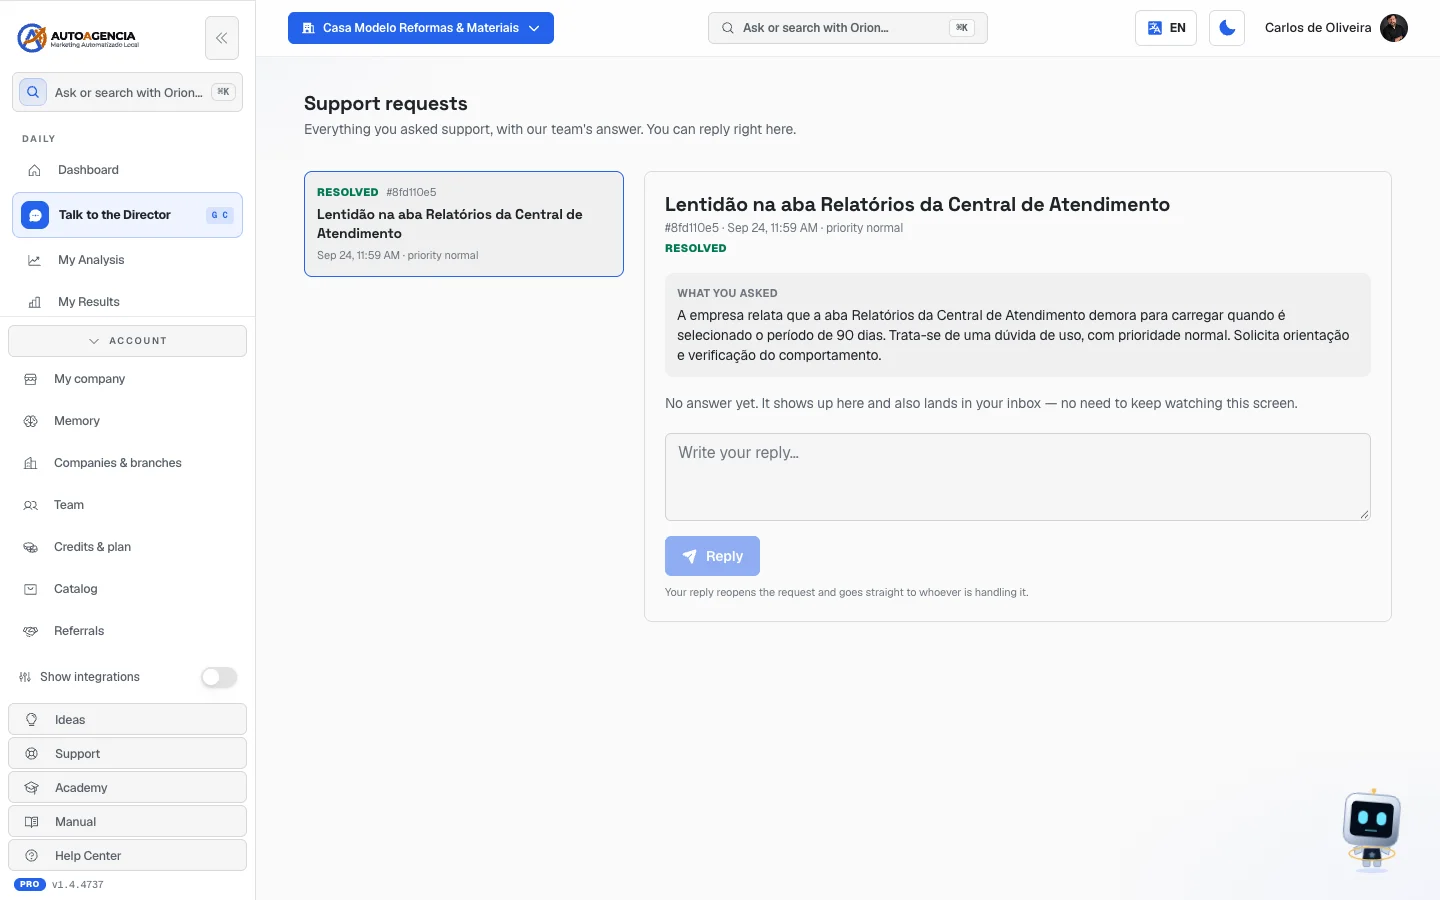 /app/tickets screen with the list of requests on the left and an open request on the right
How to read a request's status
| What appears | What it means |
|---|---|
| Open | It arrived, nobody has picked it up yet |
| Being handled | Someone is working on it right now |
| Answered — waiting for you | The ball is in your court. There's an answer waiting for you to read |
| Resolved | Resolved |
| Closed | Closed |
And the priority shows as Low, Normal, High or Urgent.
Step by step — answering a request
- In the full menu, in the footer, click Support.
- Click the request in the list on the left. (If you came through a link the specialist sent, it already opens on the right request.)
- Read the conversation from top to bottom.
- Write in the Write your reply… field (up to 5,000 characters fit).
- Click Reply. The button shows "Sending…".
- The screen notes below: "Your reply reopens the request and goes straight to whoever is handling it."
Replying reopens the request. Even if it was marked as resolved, your reply puts the matter back in the queue. If it was Being handled, it stays with the same person.
Common questions
They opened the request and it has no answer at all. The screen says: "No answer yet. It shows up here and also lands in your inbox — no need to keep watching this screen." You can close it and get on with your day.
"We couldn't load your requests right now. Try again in a moment." A passing glitch. Reload.
"We couldn't open this request." / "Request not found." The link belongs to another company, or is broken. Go back to the list and click the request from there.
"Could not record your reply right now. Please try again shortly." Your reply wasn't sent. Copy the text before trying again, so you don't lose what you wrote.
I only see part of the conversation. That's correct: the internal notes from our triage stay on our side. Only what was addressed to you appears here.
Who else at my company sees these requests? The requests are the company's, not yours. Anyone with access to the company dashboard sees the same list.
7. Ideas — asking for a new feature
Where it is: full menu → footer → Ideas
Address: /app/ideias
What it's for
It's the suggestion box — and the voting board. You write what's missing, and you vote on what other customers asked for. The screen's sentence: "Suggest what's missing and vote on what other customers asked for. What rises here enters our build queue."
Don't confuse it with Support requests. A request is "it's broken, fix it". An idea is "it doesn't exist, build it".
This board belongs to everyone. You see the ideas from every customer of the platform, not just yours — and they see yours. Write with that in mind.
What you see
The title Ideas and the sentence above. Then:
At the top, the Suggest an idea block, with two fields:
| Field | What to write | Length |
|---|---|---|
| The first (one line) | "In one sentence: what do you want to be able to do?" | from 4 to 120 characters |
| The second (big box) | "Tell us the problem this would solve in your day-to-day." | from 10 to 2,000 characters |
And the Send idea button. It stays grayed out until both fields are long enough.
Below, the list of ideas. The most voted ones stay on top; when two tie on votes, the older one comes first. Each idea is a line with:
- on the left, the vote button, with a small arrow and the number of votes;
- the status, in colored capital letters;
- the your idea label, when it's yours;
- the title and the text the person wrote;
- only on your ideas that are still in the New status and with no votes at all: the Edit and Delete buttons, below the text;
- on your ideas that have already left the New status (the team has already reviewed them): in place of the buttons, the sentence "Our team has already reviewed this idea, so it can no longer be edited or deleted.";
- on your ideas still New, but that already have votes: in place of the buttons, the sentence "It has votes: while it does, it can't be edited or deleted."
On other customers' ideas none of that appears — only the vote.
When nobody has suggested anything yet, the screen shows The first idea can be yours, with the explanation of what the board will show as soon as the first idea comes in: the ideas from all customers, how many votes each one got and where each one stands.
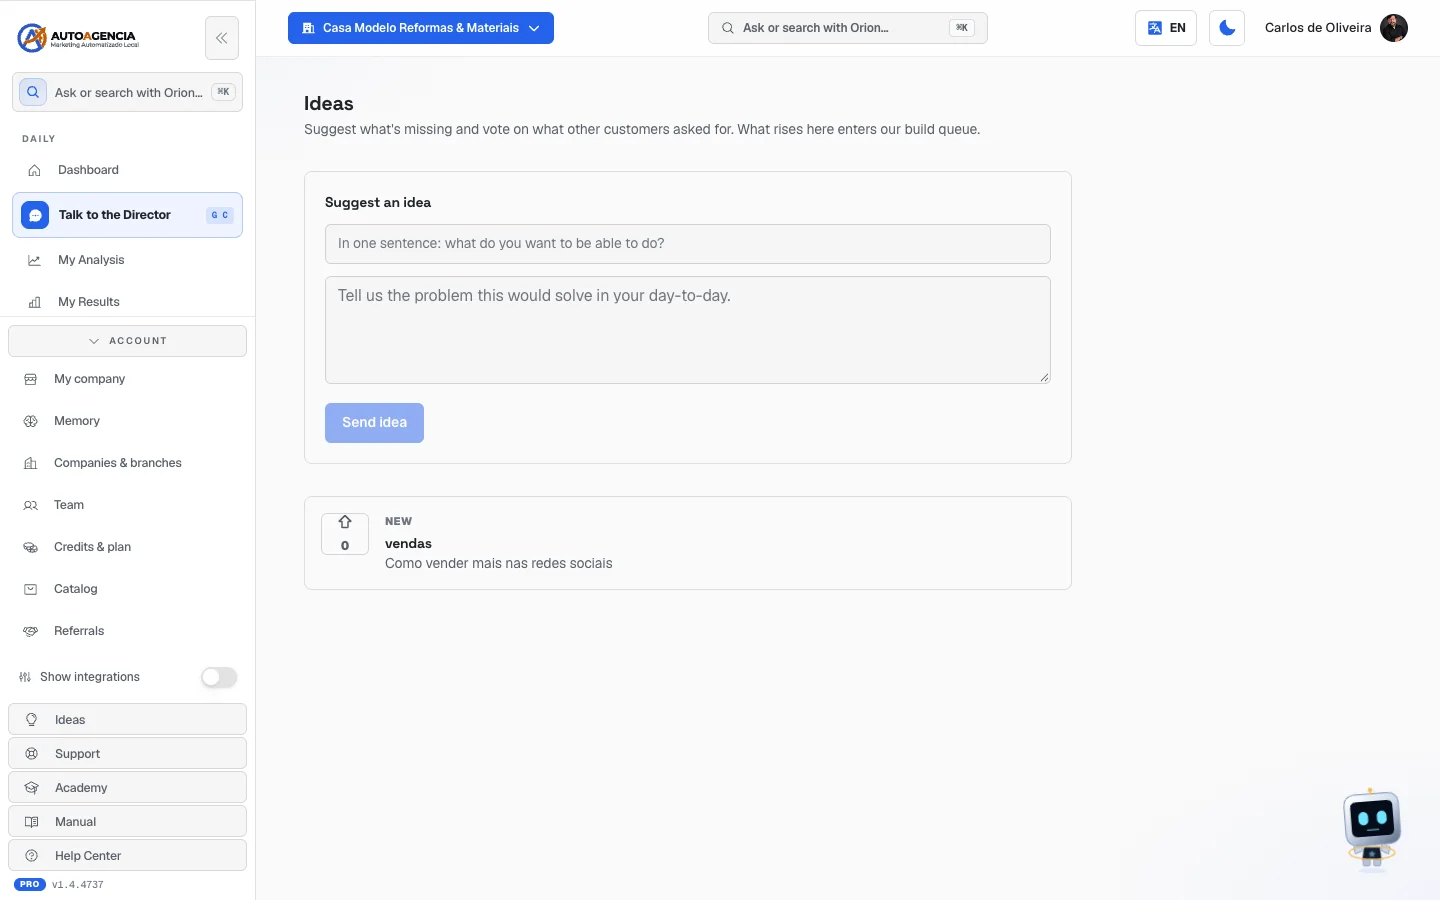 /app/ideias screen with the "Suggest an idea" block at the top and, below, the empty board "The first idea can be yours"
How to read an idea's status
| What appears | What it means |
|---|---|
| New | Just came in, nobody has looked at it yet |
| Under review | The team is studying it |
| Planned | It's going to be built |
| Shipped | It's already live |
| Won't do | It was reviewed and turned down |
Step by step — suggesting an idea
- In the full menu, in the footer, click Ideas.
- Before writing, scroll the list: if someone already asked for the same thing, it's worth more to vote on that one than to create a repeated idea — concentrated votes rise faster.
- In the first field, write the idea in one sentence. Example: "I want to get a WhatsApp notice when a contact is left without a reply".
- In the big field, tell the problem, not the technical solution. Example: "when I'm out and about, I only find out I missed a call when I open the system at night, and by then the customer has called someone else".
- Click Send idea. The button shows "Sending…".
- Done — it goes into the list with the New status, the your idea label and the Edit and Delete buttons, which stay there as long as nobody votes on it and the team doesn't review it.
Step by step — voting
- Find the idea in the list.
- Click the small arrow button, to its left. The number goes up and the button takes on the brand color.
- Changed your mind? Click again: the vote comes off and the number goes back.
Step by step — editing or deleting your idea
The rule, in one sentence: you can edit or delete your idea as long as it's in the New status and nobody has voted on it. It becomes locked in two cases, for the same reason — nobody answers a proposal that later turns into another one:
- on the first vote — whoever voted backed that text;
- when the team reviews the idea — it leaves the New status (to Under review, Planned, Shipped or Won't do), and the review was about that text. This lock applies even with no votes, and it doesn't depend on you: only the team changes the status.
Your own vote counts too. If you voted on your idea, it locks just the same. If that vote is the only one and the idea is still New, just remove it (click the small arrow again) and the buttons come back. If someone else voted, only they can remove their vote.
To edit:
- Find your idea in the list — it has the your idea label.
- Click Edit, below the text. The title and the description turn into fields, already filled in with what you wrote.
- Fix what you need. The lengths are the same as when you suggested it: title from 4 to 120 characters, description from 10 to 2,000.
- Click Save changes. It stays grayed out while nothing has changed or while one of the fields is too short. While saving, it shows "Saving…".
- Done — the notice "Idea updated." appears and the list shows the new text.
Gave up halfway? Click Cancel: the text goes back to what it was and nothing is saved.
To delete:
- On your idea, click Delete.
- The confirmation "Delete this idea?" opens, with the notice "It leaves the board for everyone, and this can't be undone."
- Delete confirms; Keep gives up and leaves everything as it was.
- Once confirmed, the notice "Idea deleted." appears and it disappears from the list — for you and for all the other customers.
Common questions
"Write a title with 4 to 120 characters and a description with 10 to 2000." One of the two fields is too short or too long. Title between 4 and 120; description between 10 and 2,000.
"We couldn't load the ideas right now. Try again in a moment." A passing glitch. Reload.
I wrote it wrong. Can I fix it later? Yes, as long as nobody has voted and the team hasn't reviewed it yet. Use your idea's Edit button (or Delete, if it was sent by mistake) — the step by step is right above. After that the idea locks and the text stays as it is; if what changed is important, tell us in Talk to the Director or open a Support request.
My idea no longer has the Edit and Delete buttons. The sentence in their place gives the reason:
- "Our team has already reviewed this idea…" — it left the New status. Removing the vote doesn't unlock it: only the team changes the status.
- "It has votes…" — someone voted. If the only vote is yours, remove it and the buttons come back.
"This idea has already been voted on — it can't be changed anymore." Someone voted between the moment you opened the screen and the click on Save changes or Delete. Nothing was changed: the list refreshes by itself and starts showing the vote, without the buttons.
"Our team has already reviewed this idea — it can't be changed anymore." The team changed the idea's status between the moment you opened the screen and the click. Nothing was changed: the list refreshes by itself, with the new status and without the buttons.
"This idea no longer exists — it was deleted." You tried to vote (or edit) on an idea that had just been deleted. The list refreshes by itself, already without it.
I voted and the number didn't change. Wait a moment and reload — the button stays locked while the vote is being saved.
Who decides what gets built? The AutoAgency team. The vote is what makes the idea rise in the list, not a promise of delivery — notice that the Won't do status exists.
8. Careful: there's ANOTHER help center — yours
This section exists to clear up a confusion that costs a lot.
There are two things called "help center" in the system, and they have nothing to do with each other.
| AutoAgency's Help Center | The help center you publish | |
|---|---|---|
| Whose it is | Ours | Yours |
| For whom | For you, an AutoAgency customer | For your customers |
| Who writes the articles | The AutoAgency team | You |
| Where it is | /app/ajuda and /ajuda | /ajuda/<apelido-da-sua-central>/<idioma> |
| Where it's managed | Nowhere — it's ours | Home → Your apps → OmniDeskSuite → Help center tab (without the app: full menu → More → Support Desk) |
| Do you need to subscribe? | No, it comes with the account | Yes — it's part of the paid OmniDeskSuite module |
Items 4 and 5 of this chapter talk only about ours. This section 8 talks about yours.
Your center, in one sentence
It's the frequently-asked-questions site that your company publishes for your customers: articles organized in collections, with their own search and a portal where your customer opens and follows requests with you.
It's part of the OmniDeskSuite module (the Support Desk, documented in the chapter Day to day, item 11). Without that module subscribed, it simply doesn't exist.
Its addresses
Each company has a nickname (a little piece of address) for its center. The addresses are:
| Address | What it is |
|---|---|
/ajuda/<apelido> | No language. It shows nothing: it sends the visitor to the right language |
/ajuda/<apelido>/<idioma> | Your center's cover page |
/ajuda/<apelido>/<idioma>/c/<coleção> | A collection of articles |
/ajuda/<apelido>/<idioma>/a/<artigo> | An article |
/ajuda/<apelido>/<idioma>/busca | The search results |
/ajuda/<apelido>/<idioma>/chamados | The portal where your customer opens and follows requests with you |
You can use your own domain. With the domain set up and active, the same center starts answering at your brand's address, and the links get shorter (
/pt/...instead of/ajuda/<apelido>/pt/...). The Help center tab inside the Support Desk takes care of that.
What your customer sees in it
On the cover page: your center's title and subtitle, the My requests link, the language selectors (when you publish in more than one), a Search the help center… field with the Search button, and then the articles — first the Most read, then each collection with its name, and at the end Other articles.
Inside an article, at the bottom: the Was this helpful? block, with the Yes and No buttons (each one shows how many people voted). Whoever clicks can also write in the Tell us what was missing (optional) field and click Send comment — and gets the thank-you Thanks for the feedback!
In the requests portal (/chamados): your customer enters their email and clicks Email me my
link; with the link in hand, they use Create a request, fill in Subject and Tell us what happened,
click Submit request — and then follow the conversation and use Send reply.
 Cover page of a help center published by a customer, showing "My requests", the search and the article collections
Step by step — managing your center
- In the full menu, open More → Support Desk.
- Go to the Help center tab.
- That's where you create the collections, write the articles, publish in each language and set up the domain.
The full step by step for that tab is in the module's own manual: Support Desk → Manual tab.
Common questions
I opened my center's address and "Page not found" appeared. The full screen: "This address doesn't exist or is no longer available." That appears both when the address is wrong and when the center hasn't been created yet or was turned off — on purpose, the page doesn't reveal which case it is.
"Help center unavailable" appeared. That's different: it's a temporary failure on our side, not a wrong address. The screen says "We're having a temporary problem. Please try again shortly."
The cover page opened, but it's empty. The message is "There are no published articles in this language yet." You have articles written, but not published in that language. Publish them in the Help center tab.
An article shows up in Portuguese and disappears in Spanish. That's the rule: an article with no translation in that language isn't shown half-translated or in another language's version — it simply doesn't exist at that address.
My center's search found nothing. The visitor reads "We couldn't find articles for this search." It's worth writing an article on that subject: inside the Support Desk, the Reports tab shows "What people search for, read, and resolve without creating a request."